


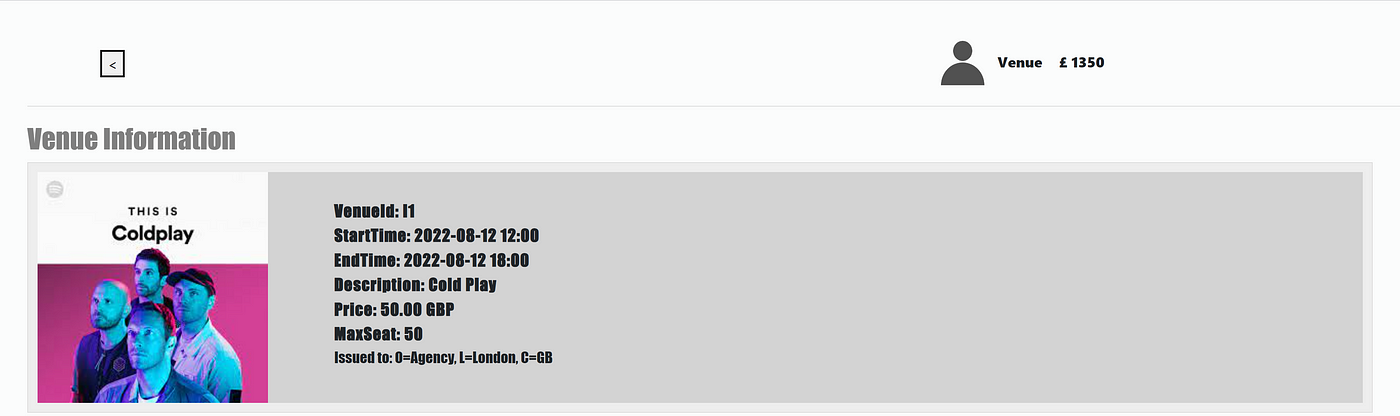
The UI looks no different than any standard browser-based UI you are accustomed to seeing. The value of a CorDapp UI is to demonstrate the value of a decentralized solution and the transaction privacy that is built into Corda.
Having built CorDapp and RPC, our build for the CorDapp moves to the final step: Coding the UI. Learning from the sample code, I decided to use React.js and Angular.js for the javascript framework. Many people who are familiar with React framework may feel glad. Unfortunately, I happen to be the one who masters the Vue framework but knows nothing about the React Framework. This also imposes another difficulty on my coding journey.
Without learning React framework systematically, I find I can still program web pages as long as I know how to:
- Switch pages
- Post requests
- Fetch results
So let’s go through this process within the ticket booking system.
- Switch pages:
Generally, there are two ways to jump to different pages: one replaces the display content of the main page, and the other switch the window’s focus to the pop-ups.
- For the first method: we define a boolean variable in the js file to control whether to hide this page or not. For example, in the following code piece, when
‘requestScreen’is true, the content wrapped in the<div>will be displayed. otherwise, it will be hidden. - For the second method, we use the javascript file to generate a pop-up. Different from the first one, the pop-up creates a model instance with its own controller. This model is invoked by the
$uibModal.open({})function, in which the HTML file name and controller name are listed. The resolve() function defines the parameters we need to pass to the new controller. After completing the details on the model, we use$uibModalInstance.dismiss()function to close the pop-up and switch the window focus back to the main page.
<div ng-show="appCtrl.requestScreen"></div>
How to generate a pop-up:
const cashModal = $uibModal.open({
 templateUrl: 'issueMoneyModal.html',
 controller: 'MoneyModalCtrl',
 controllerAs: 'moneyModalCtrl',
 resolve: {
  demoApp: () => demoApp,
  apiBaseURL: () => apiBaseURL,
  toastr: () => toastr,
 }
})
This step calls the pop-up generation process. The pop-up’s interface design refers to the HTML file’s script whose id is ‘issueMoneyModal.html’. Meanwhile, it assigns the MoneyModalCtrl to deal with the user’s operations on that pop-up.
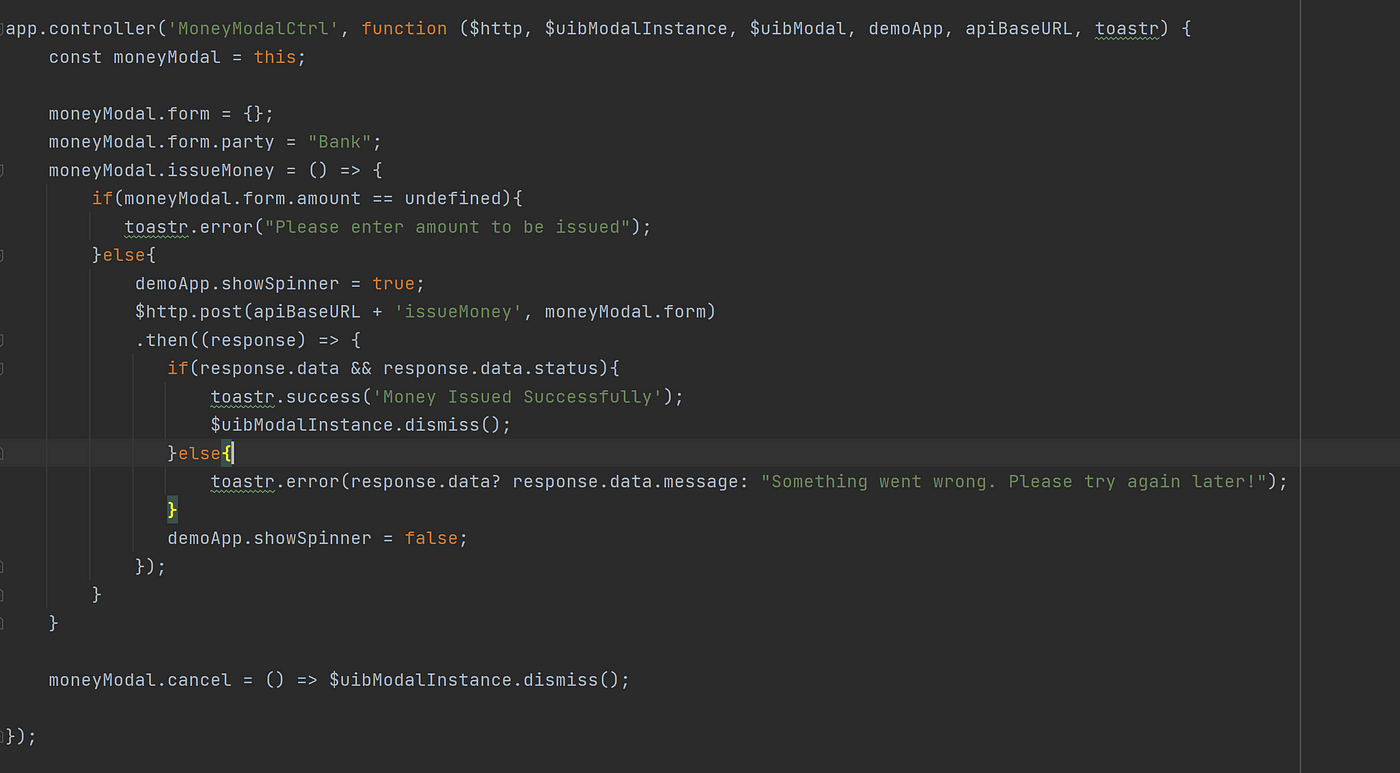
To name the MoneyModalCtrl, We use app.controller(‘MoneyModalCtrl’, function () {}); We will look into this in more detailedly in the ‘post requests’ part.
- Post Requests:
In my design, all the postings are done in the pop-up models, where the variables are defined directly without talking about the variable types, and the functions always appear in the format of ‘controller. function name = () =>{}’. To complete the posting process, we need to get the users’ input, and then we need to send this input to the server side.
The user’s requests are obtained by the function — ‘ng-model’ in the HTML file. For instance, in the Issue Cash Modal, the input of the Amount will be stored in the moneyModalCtrl.form.amount variable defined in the javascript file. If this variable name has not been defined before, then as long as the moneyModalCtrl.form is defined, a new field will be put into it.

Then let’s look into the javascript file, where we connect to the server side and send requests. As soon as the user clicks the Issue button on the web page, the issueMoney function will be triggered and starts to send requests. This step is mostly achieved by $http.post() function. In the bracket, we fill in the web address and input the information we get from the user. When we finished this process, the pop-up is closed by the function $uibModalInstance.dismiss()
- Fetch Results:
The results are obtained by $http.get() function. Within the bracket, the URL link is provided. After getting the response of that link, we store the data in a variable. In this case, the variable is demoApp.venueList.
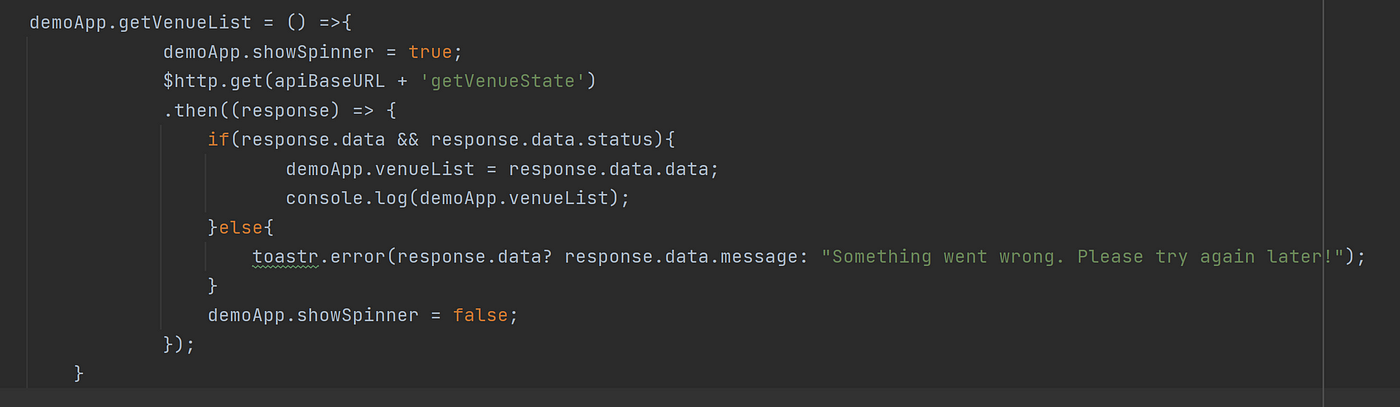
After getting the results, in order to display the venueList on the front web page, we use ng-repeat to do the loop and for each item, we use state.data.variableName to show the exact value for each variable. One trick to mention here: If you’re not sure about what’s the variable name, you can use console.log() to see how this variable is organized.

This blog tells about how to code the front-end page from a newbie’s perspective. If you’re in the same situation as me, hope this blog helps.
Thanks to Janine L


